logging in...
video credits
Garden Storage Room Redesign: From Forgotten Space to a Private Music & Work Studio
A real-life renovation visualised step by step with ArchiVinci's AI Interior Design module.
This real-life renovation project started with an unused garden storage room next to the homeowner's apartment. The goal was to transform an empty, neglected space into a private creative studio where work, music, and focus time could exist together.
The homeowner is both a startup founder and a musician. He needed a place to concentrate on marketing tasks, review startup statistics, produce music, play instruments, and invite friends for recording sessions. Instead of a simple hobby room, the design aimed to build a flexible studio that supports both deep work and creative expression.
The new room needed sound isolation, a comfortable working desk area, space for musical instruments, a recording-friendly atmosphere, and a safe, calm place to spend time. Because the room sits in the garden, separate from the main apartment, it had strong potential to become a personal retreat for focused work, art, and music production.
Step 1: The Existing Condition
Before Renovation
Before the redesign, the room was used only as a forgotten storage area. It was filled with garden tools, old materials, unused objects, and unnecessary clutter. The space had no clear function, nobody was using it, and it had become dusty, messy, and full of spiders.
Although the room looked rough at first, it already had valuable architectural qualities. The high ceiling, exposed wooden beams, natural light from the windows, and long narrow layout created a strong base for a characterful studio. The challenge was to clean, organise, and redesign the space so its raw structure became an inspiring and practical environment.
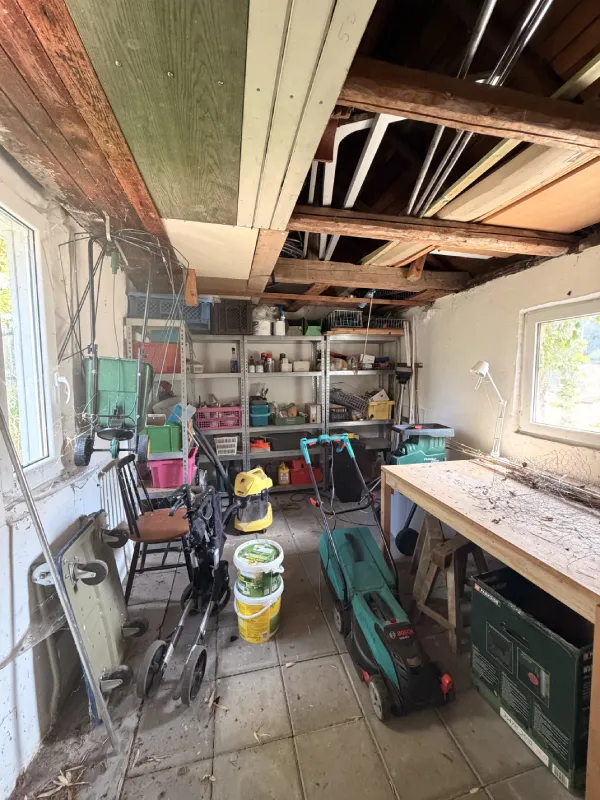
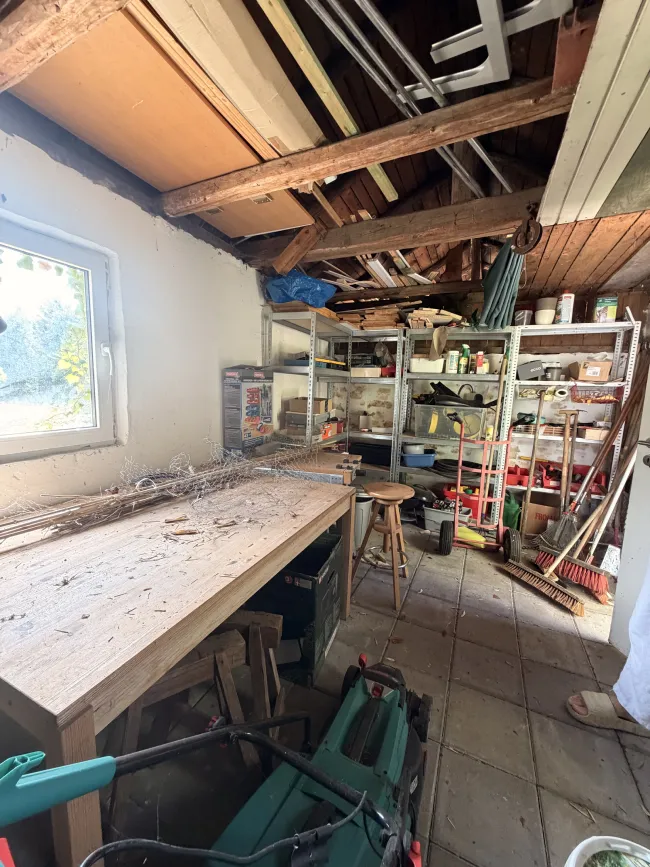
Before Renovation: The garden room was previously used as a storage area, filled with tools, old objects, and garden materials. Despite the clutter, the exposed beams, high ceiling, and natural light showed clear potential for a creative studio transformation.
Step 2: Cleaning the Existing Room with ArchiVinci
Clean Base Image
The first step was to remove all unnecessary items and reveal the actual structure of the space. Instead of designing on top of a cluttered photo, we used ArchiVinci's AI Interior Design module to digitally clean up the room and create a clear base image for the renovation concept.
For this step, we uploaded the original storage room images and used a simple prompt:
Prompt: "Clean up the room, remove all trash, furniture, and all items in the room."
With this prompt, ArchiVinci removed the garden tools, forgotten objects, old materials, and clutter from the space. The result was a clean version of the existing room, showing the empty walls, tiled floor, windows, ceiling structure, and exposed wooden beams more clearly.
Once the room was visually cleaned, it became much easier to understand the proportions, natural light, ceiling height, and layout potential of the space before adding any new design elements.
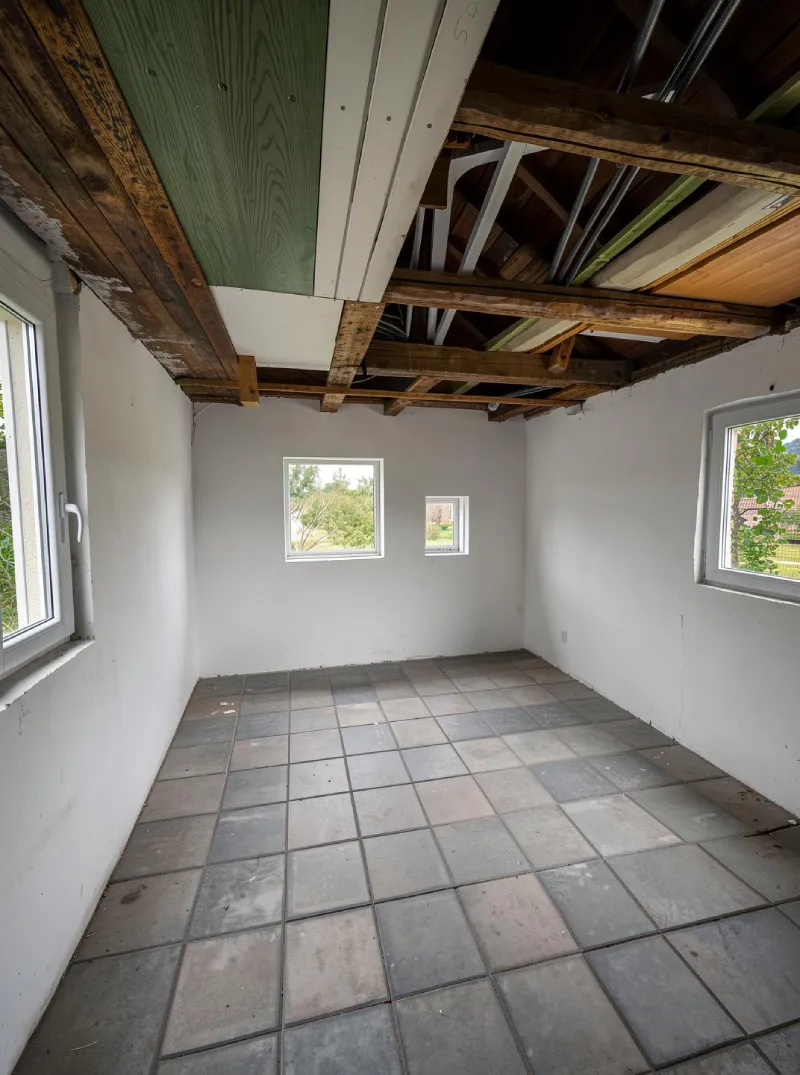
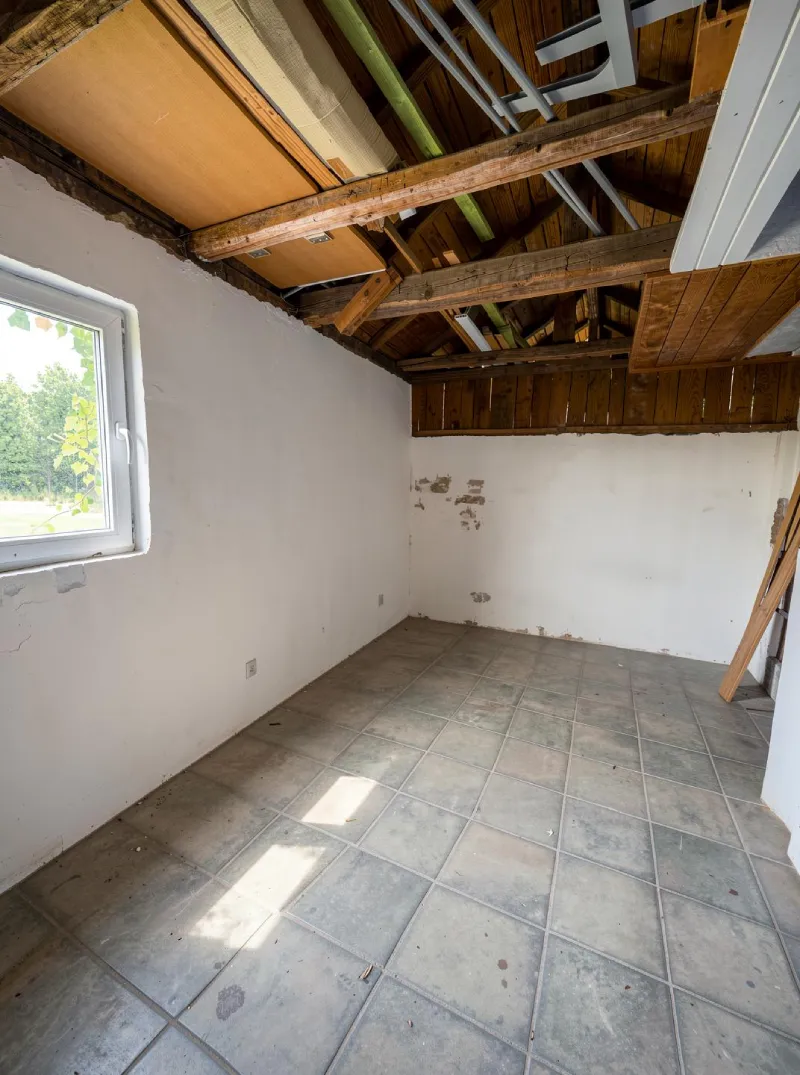
Cleaned Base Image: After removing the clutter with ArchiVinci's Interior module, the unused storage room became a clear empty space ready for redesign. This step helped us analyse the room's structure, light, and layout before developing the music and work studio concept.
Step 3: Renovating the Structure and Creating a Clean Studio Base
Structural Concept
After cleaning the room digitally, we could finally see the real potential of the space. It was larger than it first appeared, with enough area to support multiple functions such as working, playing music, recording, relaxing, and storing instruments.
Before adding furniture, the structure needed improvement. The ceiling looked unfinished, the window frames were old, and the hard tiled floor did not feel suitable for a comfortable studio. Since the room would be used for both music and focused work, we also wanted a warmer, quieter, more isolated atmosphere.
At this stage, the goal was a clean architectural base: repair the ceiling, visually organise the exposed beams, update the window frames, and cover the floor with a soft grey rug. For this step, we used the following prompt in ArchiVinci:
Prompt: "Make a white wooden ceiling with dark brown beams. Make the window frames dark brown. Put a full flex grey rug on the floor."
The result was a far more refined version of the room. The white wooden ceiling made the space brighter and cleaner, while the dark brown beams added character and preserved the original rustic feeling of the garden room. The dark window frames created contrast, and the full grey rug softened the space, making it more comfortable for working, playing music, and spending long hours inside.
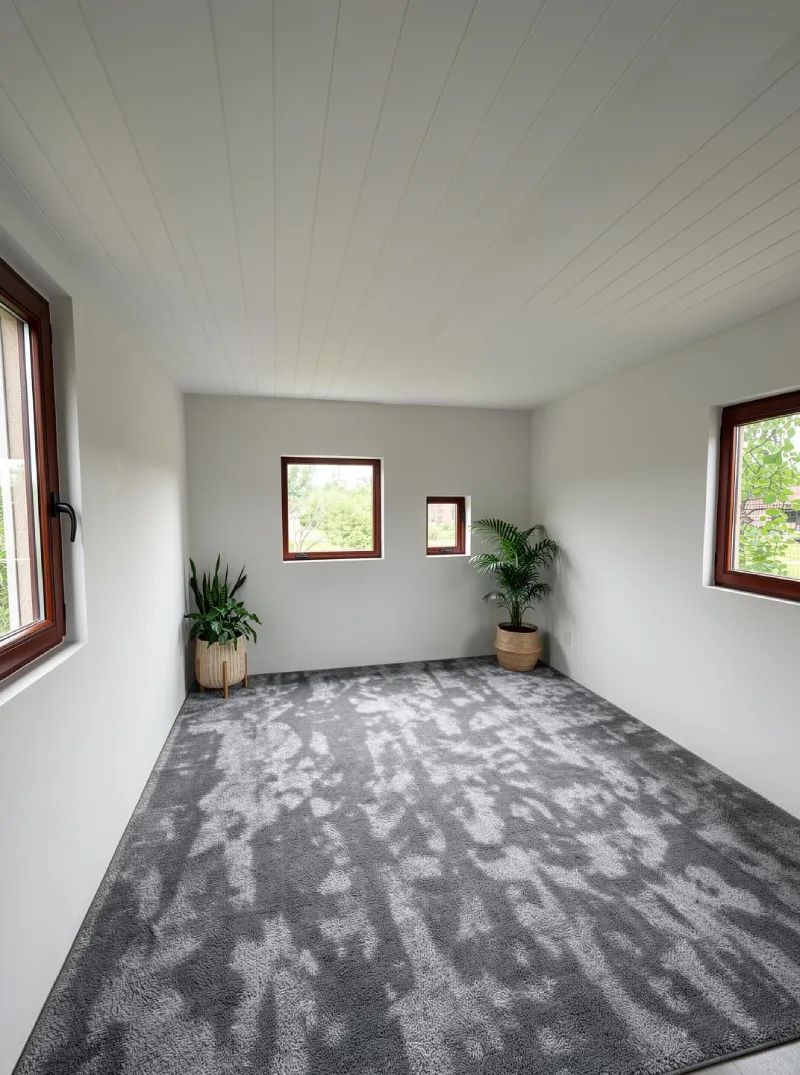
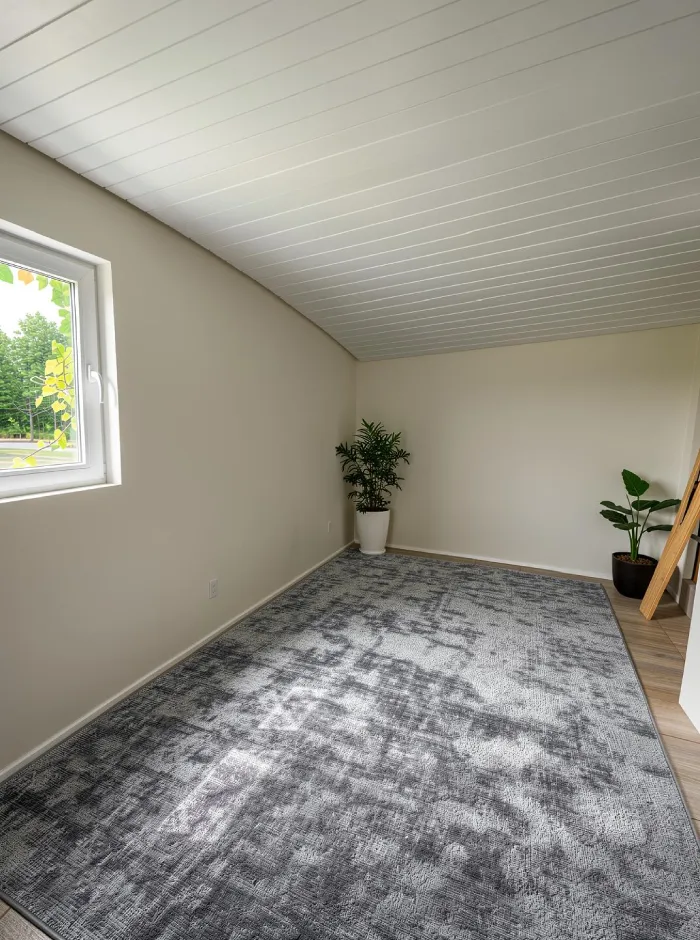
Structural Renovation Concept: The room was updated with a white wooden ceiling, dark brown beams, renovated window frames, and a full grey rug. This created a warmer, cleaner, studio-like foundation before adding furniture, instruments, and acoustic details.
Step 4: Adding the Main Furniture and Functional Zones
Furniture Layout
Once the architectural base was ready, the next step was to define the main functions of the room. Since the space needed to support both work and music, we started by placing the most important furniture and equipment first.
The layout included a working desk, an ergonomic chair, a sofa, guitars, stools, and a whiteboard. These elements divided the room into clear zones: a focused work area, a music corner, a casual seating area, and a small brainstorming space.
The desk area was designed for daily startup work, marketing tasks, and focused computer time. The guitars and stools created a relaxed music zone for practising, recording, or playing with friends. The sofa added comfort and made the room feel more like a personal retreat than a simple office.
At this stage, the room started to feel like a real creative man cave. The main structure and furniture were in place, and the space already supported the homeowner's lifestyle of switching between work, music, and relaxation throughout the day.
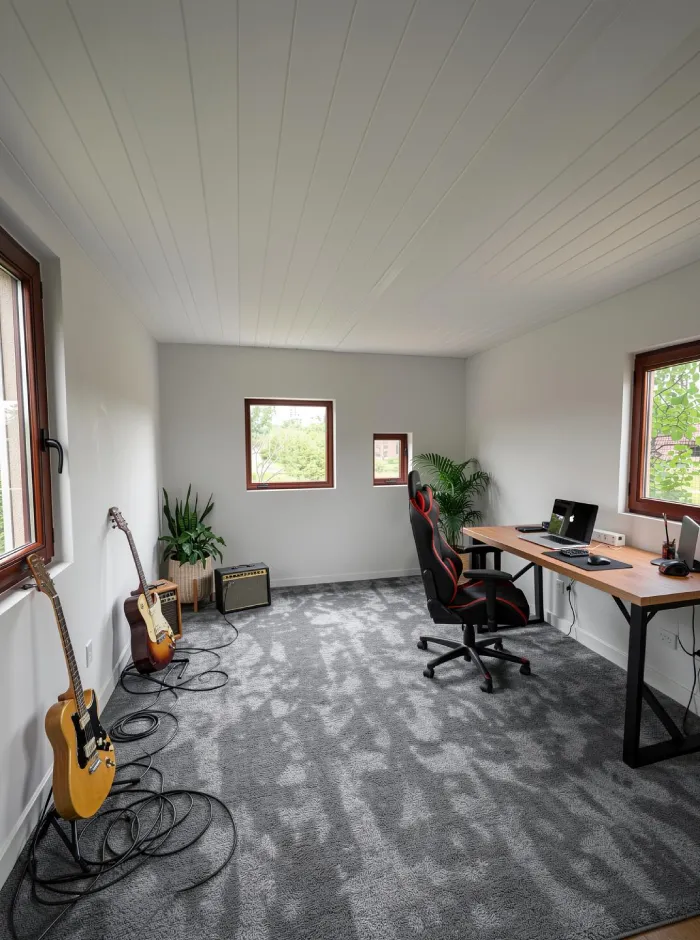
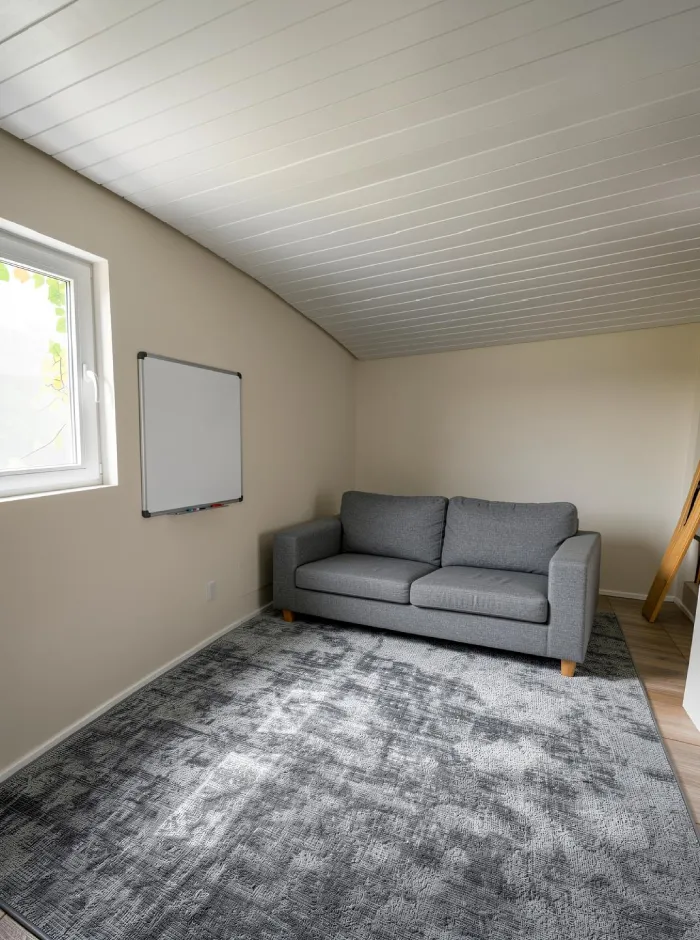
Main Furniture Placement: The first furniture concept introduced the essential elements of the studio — a work desk, sofa, guitars, stools, and a whiteboard — defining the room's main zones for work, music, and relaxation.
Step 5: Adding Accessories and the Final Atmosphere
Final Styling
After the main furniture was placed, the room had a clear function but still needed warmth, personality, and detail. The final design step was to add accessories that would make the studio feel complete and comfortable.
We added lighting, indoor plants, a coffee table, shelves, wall decor, and small decorative elements. These details softened the room and made it feel more lived in. The lamps created a warmer evening atmosphere, the plants brought freshness into the space, and the shelves added both storage and character — room for books, records, equipment, and personal objects.
This final layer turned the design from a functional layout into a complete creative studio. The space now feels calm enough for focused work, comfortable enough for long hours, and inspiring enough for music production and creative sessions with friends.
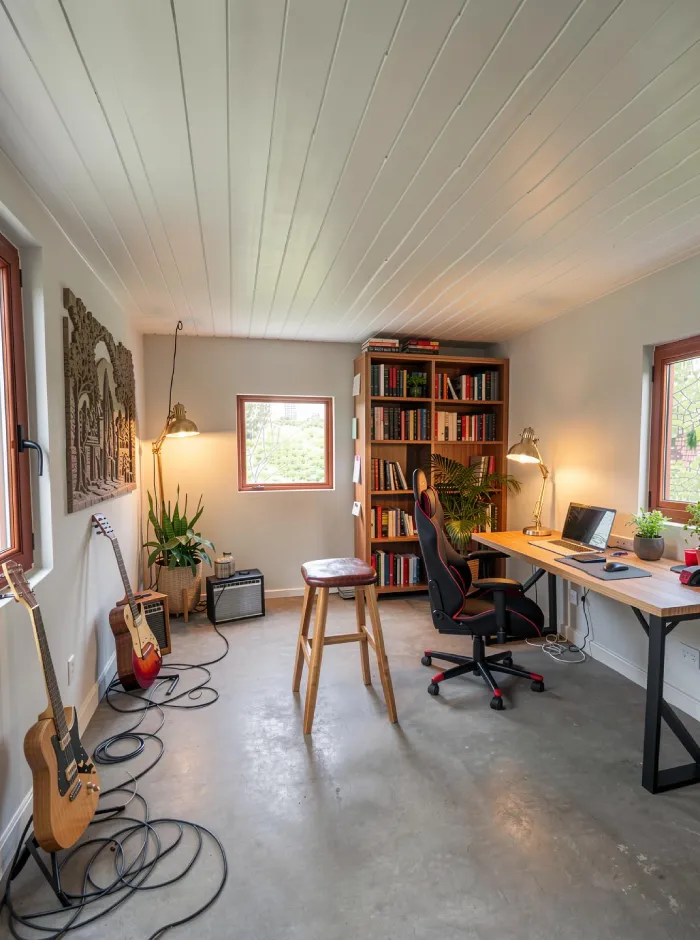
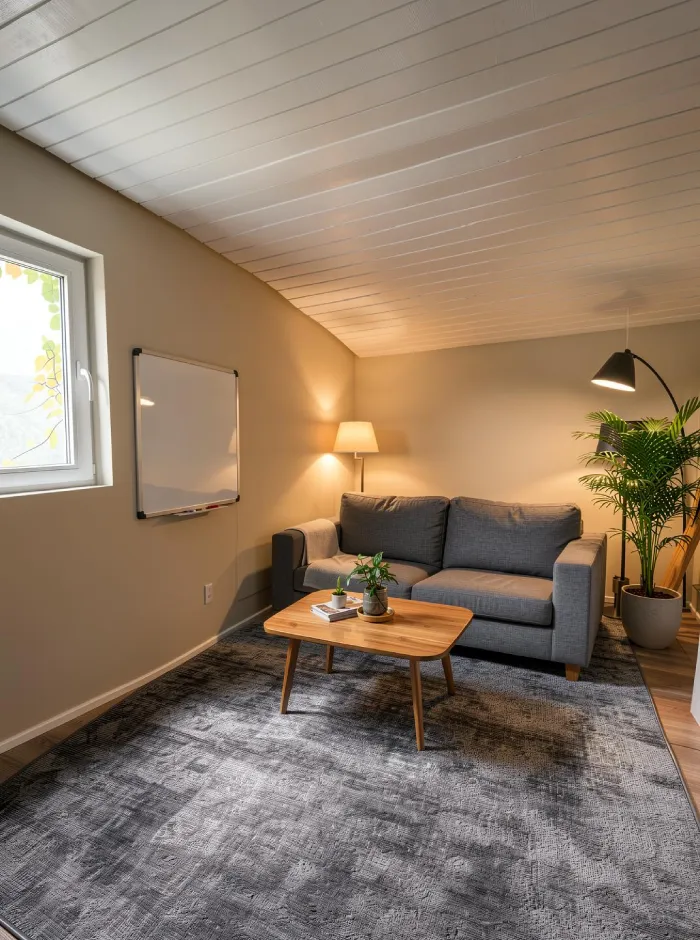
Final Studio Atmosphere: Accessories such as lamps, plants, shelves, a coffee table, and wall decor completed the room. The final design turned the empty garden storage room into a warm, functional, and personal music and work studio.
Step 6: Testing the Studio Atmosphere at Night
Nighttime Mood
After the room was fully designed, we wanted to test how the space would feel at night. This was an important part of the process because the homeowner often works and creates music after dark.
The goal was not only to show the room in daylight, but also to understand its evening mood. A studio like this needs to feel calm, warm, and focused at night, with lighting that supports long working sessions, relaxed music practice, and late-night creative time.
For this step, we used ArchiVinci to generate nighttime versions of the final design. The warm lamps, darker windows, soft shadows, and cosy lighting helped us see how the room would feel in real life.
The result showed that the studio could work well as a night-focused creative space. It felt private, comfortable, and atmospheric — a strong match for the homeowner's lifestyle and working habits.
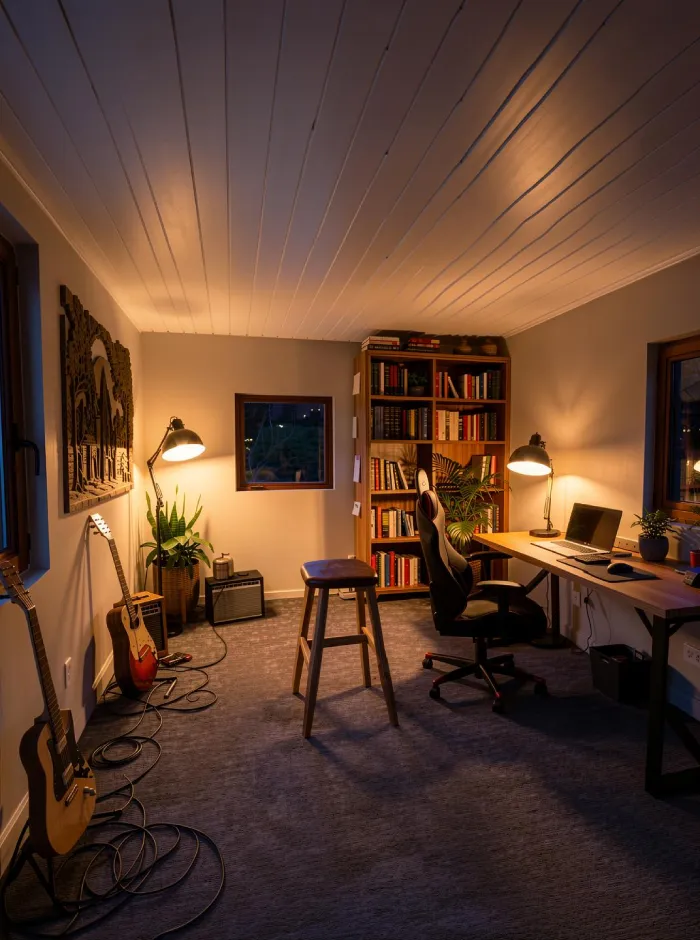
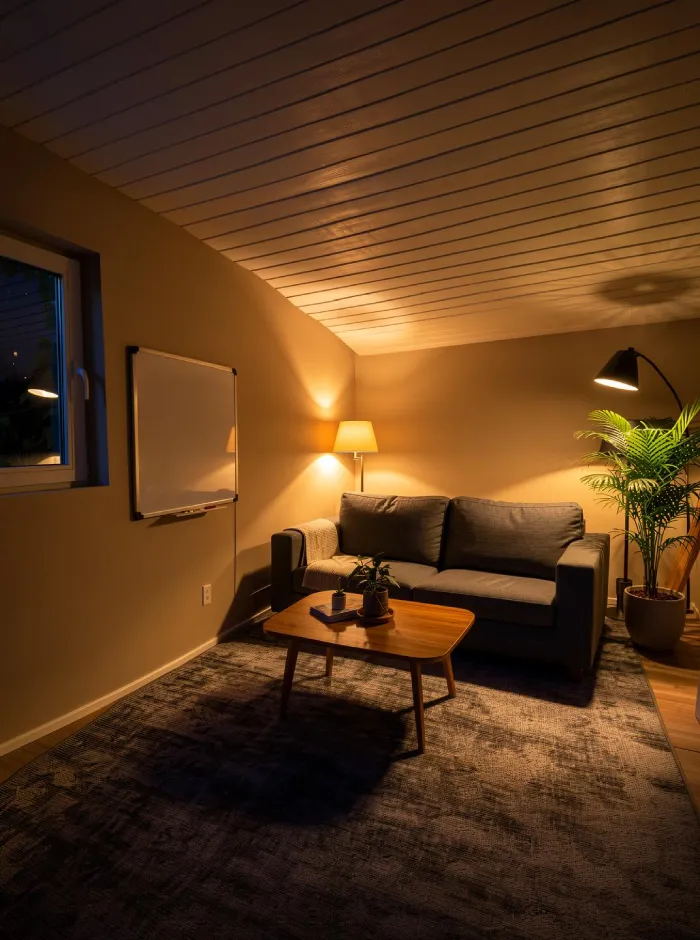
Nighttime Studio Render: The final design was tested in a nighttime atmosphere to show how the studio would feel during late working hours, music sessions, and quiet focus time.
Step 7: Adding People to Bring the Space to Life
Lifestyle Render
The final step was to make the renders feel more alive. Empty interiors show the design clearly, but they do not always communicate how a space will actually be used. To help the client understand the experience, we added people into the scenes.
Using ArchiVinci's AI Interior Design module again, we asked the tool to place people inside the studio. In one render, a person is playing guitar; in another, someone is working on a MacBook. These small human details explained the purpose of the room more clearly.
By showing the studio in use, the client could imagine real moments inside the space: working at night, playing music, taking a break on the sofa, or recording with friends. This created a stronger emotional connection than an empty room render.
Adding people also helped communicate scale, comfort, and daily use. The room no longer looked like only a finished design concept — it started to feel like a real place where the homeowner could work, create, and spend time.
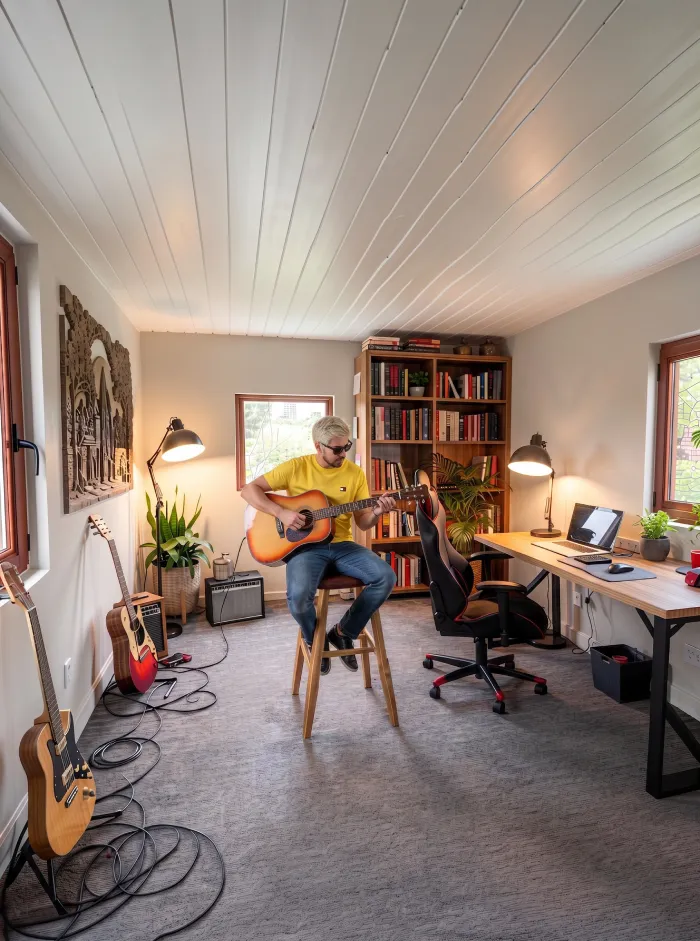
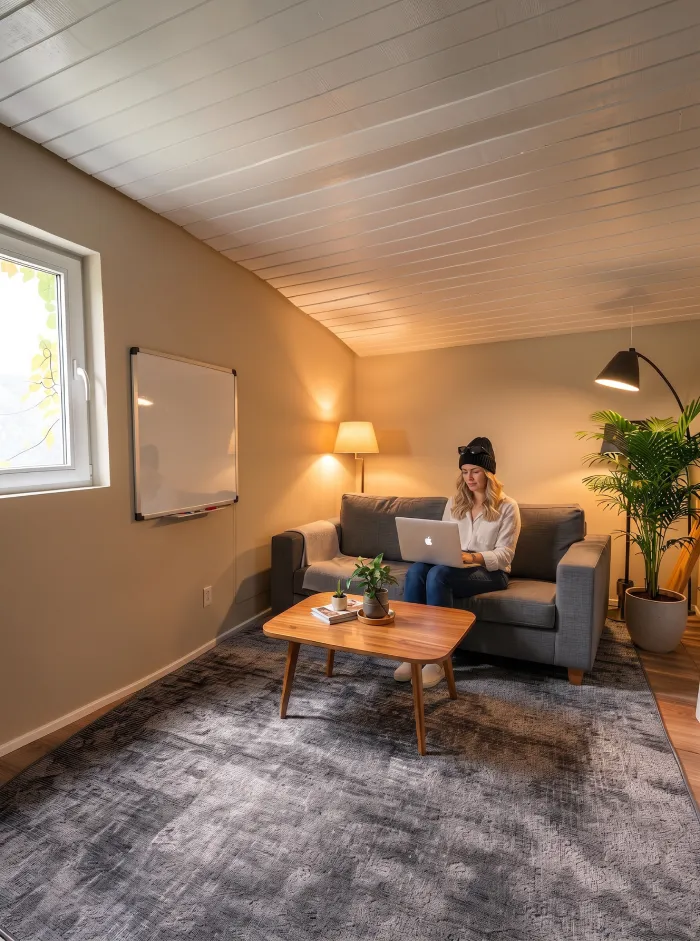
Lifestyle Render with People: People were added to the renders to show how the studio could be used in real life, from playing guitar to working on a laptop. This helped the client connect emotionally with the final concept.
Redesign Your Own Space with AI
Turn a room photo, sketch, or render into a realistic interior concept in seconds — no design software required.